

What Is The Typical Setup Process For A Two Color Pad Printer Featuring A Shuttle Table
2026-02-05
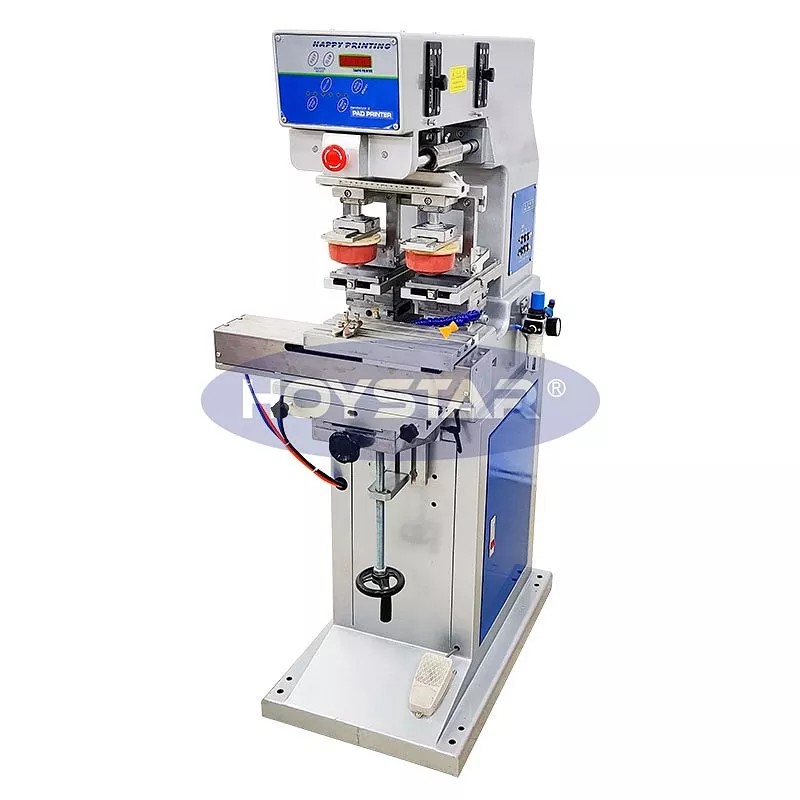
Setting up a Two Color Pad Printer With Shuttle Worktable efficiently is crucial for achieving high-quality, consistent multi-color prints. A proper setup minimizes downtime and maximizes the return on your equipment investment. At HOYSTAR, we engineer our printers for precision and user-friendly operation, and a structured setup process is key to unlocking their full potential. This guide outlines the typical steps to get your HOYSTAR dual-color shuttle system production-ready.
The setup process can be broken down into three main phases: Preparation, Machine Configuration, and Test & Fine-tuning.
Phase 1: Preparation and Safety
-
Workspace Readiness: Ensure the printer is on a stable, level surface in a clean, well-ventilated area free from excessive dust and vibration.
-
Power and Air Supply: Verify that the electrical power (voltage/phase) matches the machine's requirements. Connect a clean, dry air supply at the correct pressure (typically 6-8 bar) as specified in the HOYSTAR manual.
-
Material Preparation: Have your approved inks, cliché plates (one for each color), printing pads, and substrates ready.
Phase 2: Machine Configuration
This phase involves installing the core components. Follow this logical sequence:
| Step | Action | Key Consideration |
|---|---|---|
| 1 | Install Clichés | Secure each engraved plate squarely in its respective ink cup holder. Ensure perfect leveling. |
| 2 | Install Ink Cups | Position the cups over the clichés, fill with ink, and adjust the doctor blade for a clean sweep. |
| 3 | Mount Printing Pads | Choose the correct pad shape and hardness for your part geometry. Install and tighten securely on the pad arm. |
| 4 | Configure Shuttle Table | Adjust the shuttle stroke so that the part moves precisely between the two printing stations. |
Phase 3: Test and Fine-tuning
-
Program the print stroke, dwell times, and shuttle movement in the control panel.
-
Run several dry cycles to check alignment and mechanics.
-
Conduct test prints on scrap substrates. Fine-tune:
-
Registration: Adjust the X, Y, and Θ (theta) axes to align the two colors perfectly.
-
Pad Pressure: Optimize to ensure complete ink transfer without deformation.
-
Two Color Pad Printer With Shuttle Worktable FAQ
Q: How do I ensure perfect color registration between the first and second print?
A: Achieving perfect registration relies on precise mechanical setup. First, ensure the shuttle table moves with zero play and stops consistently at each station. Use the HOYSTAR control system to micro-adjust the pad touchdown position for the second color relative to the first. Fine-tuning the Θ (rotational) adjustment is often critical for aligning intricate designs.
Q: What is the most common cause of smudging or ghosting in two-color printing?
A: The most common cause is insufficient drying or curing time between the first and second color application. The Two Color Pad Printer With Shuttle Worktable allows for a natural flash-off period as the part shuttles. If smudging occurs, increase the delay before the second pad touches the part, or consider using a faster-tack ink for the base layer.
Q: Can the shuttle table handle heavy or irregularly shaped parts?
A: Yes, a robust Two Color Pad Printer With Shuttle Worktable like those from HOYSTAR is designed for this. The key is proper fixture (jig) design. A custom-made vacuum or mechanical fixture securely holds the part during the shuttle movement and printing process, ensuring stability and repeatability even for challenging components.
Mastering the setup of your Two Color Pad Printer With Shuttle Worktable is the foundation for exceptional multi-color decoration. By following a disciplined process, you leverage the automation and precision built into the HOYSTAR system to boost your productivity and print quality. For complex substrates or to explore how a HOYSTAR printing solution can streamline your specific application, our engineering team is ready to assist.
Contact us today for a personalized consultation or to request a demonstration.